Photo courtesy of Pinterest
By Stephan Sardone
The clouds have parted and the sun has finally come out. But driving up to your home can be a daunting experience, especially if you are returning from the Dallas Arboretum and Botanical Garden. Your home looks so drab and dreary. That’s OK for winter, but not for the spring and summer months.
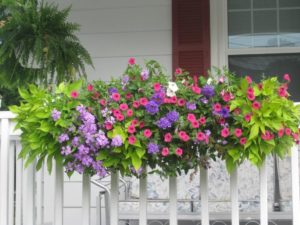
The house needs color. It needs flowers. And now is the time to add them. You can add planter boxes for the porch or to hang over railings. It is easy, inexpensive and the most novice carpenter can build them. We will look at how to build a planter box from a do-it-yourself point of view.
For under $50 and assuming you have basic construction tools like a saw, work bench and tape measure, you can build four-foot cedar planters with supplies found at your local hardware store. You will need wood, butt joints, nails, adhesive, sandpaper and some other hardware items. Staining is up to you.
For each planter, buy at least three 8-foot 1″ x 2″ boards, one 8-foot 1″ x 6″ board and two 8-foot 1″ x 8″ boards. You will cut four pieces of 1″ x 2″ to 48″ in length, four pieces of 1″ x 2″ to 7,” one piece of 1″ x 6″ to 45,” two pieces of 1″ x 8″ to 46-1/2″ inches and two pieces of 1″ x 8″ to 5-1/2″ in length
Measure out and mark each board with a square before cutting. Cut the 48″ 1″ x 2″ boards first. Then cut the 1″ x 6″ planter bottom and 1″ x 8″ planter sides. Follow with the 5-1/2″ 1″ x 8″ and 7″ 1″ x 2″ pieces, being careful to dry-fit everything as you go, making adjustments as necessary.
Now things get sticky. Place a thin bead of construction adhesive on the end of the 1″ x 6″ planter bottom and secure a 5-1/2” side board with three nails. Repeat on the other side. Apply adhesive to the edges of the planter bottom and sides and attach a 46-1/2″ 1″ x 8″ side board with several nails and repeat.
Secure one 48″ 1″ x 2″ board to a 7″ 1″ x 2″ with a single nail to make one corner of the bottom trim. Apply a thin bead of adhesive on the inside and secure to the bottom of the box with nails. Then secure the second 7″ 1″ x 2″ with adhesive and nails and secure the last 48″ 1″ x 2″ trim board.
Repeat the same process for the top trim and then, using a hacksaw, remove excess wood. Drill several drainage holes in the bottom of the planter, sand and clean. Wipe down the entire planter with a damp cloth and allow to dry completely. Seal if you choose.
Hang the planters with brackets and fill with soil and flowers. Pansies, zinnias, daylilies and snapdragons are great choices. Assuming you are building three boxes, consider making the middle planter functional for uses in the kitchen. You can plant lettuce, spinach and other vegetables to enhance your culinary urges.
Your house looks vibrant again. You have added color that your home might desperately need. And the approach is very simple and not a bear, even after your home has hibernated for the winter.
Stephan Sardone of his wife and two daughters are Lake Highlands residents.
